Beginning the Baking Adventure

Ever wanted to bake the simplest cake for your family member, but just couldn’t figure out where to start? Or thought you didn’t have the tools, or even the skills? Don’t sweat, this is a common problem numerous people face on a daily basis. Hence why, in this post, we will list a few of the basic steps to help you feel a little more confident to take a step into the world of baking.
1. Measuring the Ingredients:
(image borrowed from google)
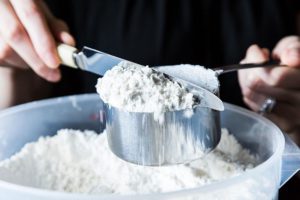
Now that you have all the ingredients laid out in front of you, you are ready to begin. The first, and the biggest problem people tend to face is the fact that their cake is so dense that caves in from the top, or that it just doesn’t taste right. One of the reasons for this to occur (the second reason will be discussed later on) is that there is too much flour. In other words, the flour was not measured right. In order to do this correctly there are one of two ways:
- Spooning Method: You take one tablespoon of flour at a time, and put into the measuring cup. You keep repeating this step till the measuring cup is full.
- Stirring Method: You take a spatula, and fluff the flour before dipping your measuring cup into it.
No matter what method desire to apply, there is one step you surely cannot miss! that is to make sure you level all your ingredients (as portrayed in the image above). This will get rid of all the excess ingredients, and make your recipe very precise. Remember, baking is all about being precise.
2. Mixing Batter
(image borrowed from google)
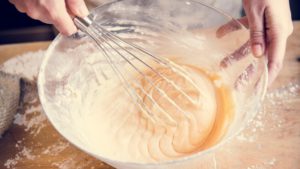
To get the perfect cake, there shouldn’t be any lumps in the batter. Therefore, combining ingredients to make the cake batter is a very delicate process. That’s why, for beginners, it is stated mix the wet ingredients in a different bowl than the dry ingredients. You may question why. Why to waste another bowl, and increase your time at the sink during clean up. Yes, we know it’s tough watching the pots and pans increase; however, this step will save you from baking disaster. When you mix the wet and dry ingredients separately, you have more control on the lumps. Gradually add the dry ingredients to the wet ingredients. Mix constantly, before adding the next batch. This gradual pour will ensure that you have a lump free batter.
3. Working with Baking Soda
(image borrowed from google)
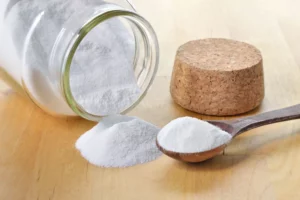
Baking Soda is key ingredient that causes the cake to rise. Yes, it is very different from Baking Powder. The biggest hint to a nicely risen cake is to never over mix the batter! The more you mix, the more you kill the batter. As a result, you have a very dense, and sunken cake.
4. Preparing the Cake for the Bake
(image borrowed from google)
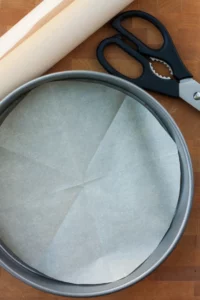
Here’s a tip that will save you a lot of trouble in the end. Trust us on this. Many people tend to skip this step, and end up either with a broken cake, or a stuck cake. Therefore, don’t skip this step. Grease your tin, and line your cake tin with parchment paper, and watch how easily your cake will slide out once it’s done baking. Thank us later!
5. Baking the Cake
(image borrowed from google)
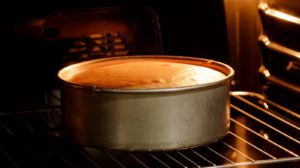
You worked so hard putting all those ingredients together, and now your mouth really can’t stop watering. You really want that amazing piece of cake. On the other hand, you are cooking for the very first time, and are afraid if this recipe really worked. Whatever your reason may be, we understand the urge to go up and constantly open the oven door. That, my friend, is your biggest mistake. The more you open the door, the less the cake will rise. That’s why, don’t constantly open the door. Although hovering around the oven the cake is ready is allowed. Trust us, that’s exactly what we do.
6. Checking if the Cake is Ready
(image borrowed from google)
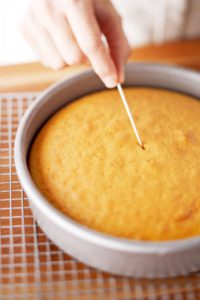
Once it nears the end of the baking time written on the recipe. You feel you are ready to pull the yummy looking cake out, and you do so. Now how do you know for sure that the cake has actually baked all the way through? That’s when the oldest trick in the book comes in handy: Toothpick Test. Right after you pull the cake out, insert a toothpick into the very center of the cake. Once you pull it out, and it’s clean, you have a fully baked cake. If there is still dough on the toothpick, plop the cake back into the oven for a little more baking.
Remember: Use the toothpick method only when any wet dough is clearly not visible. If you do this method too early, or numerous times, you may end up with a caved in cake.
7. Demolding a Cake
(image borrowed from google)
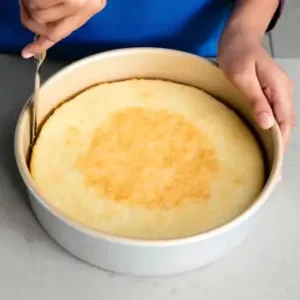
The last, and final trick to baking a perfect cake is to actually taking it out without breaking it. Once you pull the cake out of the oven, don’t mess with it. Let the cake cool down to where the outside of the cake is easy to work with. Then, with a serrated knife, work the edges of the cake. This will help the cake come loose from the tin. Then, flip the cake upside down, and gently tap the bottom of the tin. Make sure the cooling rack, or some kind of support is on the opposite side, as you tap the bottom. The cake should simply slide out (if parchment paper was applied). Let the cake further cool down, on a cooling rack, before you do anything to it!
That’s it! Those are the basic cake baking techniques you must keep in mind while baking. Make sure you follow these steps, and you are bound to have a beautiful cake! All the best on all your baking adventures! All doors are now open!
